In the world of Dark Souls Remastered, every boss battle is a test of skill and determination.
This guide will help you navigate the game’s treacherous landscapes and triumph over each boss. We’ll detail the location, loot, and strategies for beating all the bosses, including the optional and DLC battles. Ready your sword and shield, and let’s dive in!
All Dark Souls Remastered Bosses
Asylum Demon

Location: Undead Asylum
Loot: Demon’s Great Hammer (if defeated before getting equipment), Big Pilgrim’s Key
How To Beat Asylum Demon
The Asylum Demon is the first boss you’ll encounter in Dark Souls Remastered. This giant demon wields a massive hammer and can be quite intimidating for new players.
To defeat it, you should dodge its attacks and position yourself behind it to strike. Additionally, if you haven’t grabbed your starting equipment yet, you can defeat the demon using the plunging attack from the balcony, dealing significant damage and obtaining the Demon’s Great Hammer as a bonus.
Taurus Demon

Location: Undead Burg
Loot: Homeward Bone, Humanity, Demon’s Greataxe
How To Beat Taurus Demon
The Taurus Demon is a formidable foe found in the Undead Burg. This enormous beast wields a huge axe and can deal massive damage with its wide swings. To overcome the Taurus Demon, make use of the ladder near the fog gate to climb the tower, then perform a plunging attack on it. Keep your distance to avoid its wide swings, and strike when there’s an opening.
Hellkite Dragon / The Bridge Wyvern (Optional)

Location: Undead Burg
Loot: Drake Sword (if the tail is severed)
How To Beat Hellkite Dragon
The Hellkite Dragon, also known as the Bridge Wyvern, is an optional boss found on the bridge in the Undead Burg. This fearsome dragon can unleash devastating fire attacks, making fire-resistant equipment particularly useful in this battle.
To defeat it, shoot its tail with arrows from a distance to sever it and obtain the Drake Sword. Then, lure the dragon down and attack its legs while dodging its fire breath.
Bell Gargoyles

Location: Undead Parish
Loot: Twin Humanities, Gargoyle’s Halberd, Gargoyle’s Shield, Gargoyle’s Helm, Gargoyle’s Tail Axe
How To Beat Bell Gargoyles
The Bell Gargoyles are a challenging pair of bosses found in the Undead Parish. These fearsome creatures can breathe fire and are capable of flight, making them difficult to deal with.
To defeat them, focus on one gargoyle at a time, dodge their fire attacks, and strike them from behind when they’re recovering. Severing their tails will also grant you the Gargoyle Tail Axe as a bonus.
Capra Demon (Optional)

Location: Lower Undead Burg
Loot: Key to the Depths, Homeward Bone, Humanity, Demon Great Machete
How To Beat Capra Demon
The Capra Demon is an optional boss located in the Lower Undead Burg. This menacing demon is accompanied by two dogs, making the battle even more challenging.
To defeat the Capra Demon, quickly dispatch the dogs to avoid being overwhelmed. Then, use the stairs in the arena to create distance and perform plunging attacks on the demon while avoiding its powerful swings.
Moonlight Butterfly (Optional)

Location: Darkroot Garden
Loot: Soul of the Moonlight Butterfly, Blue Titanite Chunk, Divine Ember (if approached after the boss fight)
How To Beat Moonlight Butterfly
The Moonlight Butterfly is an optional boss found in the Darkroot Garden. This ethereal creature can float out of reach and launch powerful magic attacks. To defeat the Moonlight Butterfly, use ranged attacks to damage it, dodge its magic projectiles, and strike it when it lands to recover stamina. Patience is key in this battle.
Gaping Dragon

Location: Depths
Loot: Blighttown Key, Dragon King Greataxe (if the tail is severed), Gaping Dragon Soul, Twin Humanities
How To Beat Gaping Dragon
The Gaping Dragon is a massive, grotesque boss found in the Depths. Its enormous size and powerful attacks can be intimidating, but with patience and strategy, you can defeat it. To do so, keep your distance and strike its head when it’s recovering from its charge attack. Be patient and avoid its tail swipe, as it can deal significant damage. Severing its tail will grant you the Dragon King Greataxe as a bonus.
Stray Demon (Optional)

Location: Undead Asylum (return visit)
Loot: Titanite Slab, Humanity, Homeward Bone
How To Beat Stray Demon
The Stray Demon is an optional boss encountered when you return to the Undead Asylum. This powerful demon uses both physical and magic attacks, making it a tough opponent.
To defeat the Stray Demon, stay behind it to avoid its magic attacks, dodge its swings, and strike when it’s recovering. Patience and proper positioning are crucial in this battle.
Chaos Witch Quelaag

Location: Blighttown
Loot: Soul of Quelaag, Twin Humanities
How To Beat Chaos Witch Quelaag
Chaos Witch Quelaag is a fearsome boss found in Blighttown. This half-human, half-spider creature uses a combination of fire and physical attacks to keep you on your toes.
To defeat Quelaag, keep a safe distance from the lava she produces, focus on attacking her human torso, and watch out for her AoE explosion attack. Careful positioning and awareness of her attacks are key to victory.
Great Grey Wolf Sif

Location: Darkroot Garden
Loot: Covenant of Artorias, Soul of Sif, Humanity, Homeward Bone
How To Beat Great Grey Wolf Sif
The Great Grey Wolf Sif is a swift and powerful boss found in the Darkroot Garden. This giant wolf wields a massive sword in its mouth, making its attacks incredibly dangerous.
To defeat Sif, get under its body to avoid its attacks and focus on striking its legs. Be cautious when it starts limping, as it gains new attacks that can catch you off guard.
Hydra (Optional)

Location: Darkroot Basin
Loot: Dragon Scale, Dusk Crown Ring
How To Beat Hydra
The Hydra is an optional boss found in the Darkroot Basin. This multi-headed serpent can launch powerful water projectiles and deal massive damage with its heads.
To defeat the Hydra, block or dodge its water projectiles, then get close and attack the heads when they dive toward you. Use a long-range weapon if necessary to sever the heads and claim victory.
Iron Golem

Location: Sen’s Fortress
Loot: Core of an Iron Golem, Humanity
How To Beat Iron Golem
The Iron Golem is a towering boss found in Sen’s Fortress. This massive construct uses powerful physical attacks and can knock you off the platform if you’re not careful.
To defeat the Iron Golem, aim for its legs to stagger it, then attack its upper body when it’s vulnerable. Use ranged attacks if you need to keep your distance, and beware of its sweeping attacks.
Crossbreed Priscilla (Optional)

Location: Painted World of Ariamis
Loot: Soul of Priscilla, Priscilla’s Dagger (if the tail is severed)
How To Beat Crossbreed Priscilla
Crossbreed Priscilla is an optional boss found in the Painted World of Ariamis. This half-human, half-dragon creature can turn invisible, making her difficult to track.
To defeat Priscilla, watch for her footprints in the snow and attack her when she’s revealed. Severing her tail will grant you Priscilla’s Dagger as a bonus.
Ornstein and Smough

Location: Anor Londo
Loot: Soul of Ornstein or Soul of Smough, Leo Ring (if Ornstein is defeated last), Humanity
How To Beat Ornstein and Smough
Ornstein and Smough are a formidable duo found in Anor Londo. These two powerful bosses can be incredibly challenging, as they complement each other’s strengths and cover each other’s weaknesses.
To defeat them, focus on one of them at a time, keeping in mind that the surviving boss will absorb the other’s powers and regain full health. Use the pillars in the room to separate them and create opportunities for attacks. Patience, timing, and proper positioning are critical to overcoming this difficult battle.
Dark Sun Gwyndolin (Optional)

Location: Anor Londo
Loot: Soul of Gwyndolin, Brass Set, Sunlight Blade Miracle (in a chest after the fight)
How To Beat Dark Sun Gwyndolin
Dark Sun Gwyndolin is an optional boss found in Anor Londo. This enigmatic deity uses powerful magic and illusion to keep you at bay.
To defeat Gwyndolin, dodge or block its magic attacks while closing the distance, and strike when you have the opportunity. Be prepared to chase Gwyndolin down the long hallway, as it will teleport away frequently.
Pinwheel

Location: The Catacombs
Loot: Rite of Kindling, Mask of the Father/Mother/Child (random drop)
How To Beat Pinwheel
Pinwheel is a boss found in the depths of The Catacombs. This necromancer can create clones of itself and cast damaging magic.
To defeat Pinwheel, focus on finding and attacking the real one, which can be identified by the different color of its lantern. Be aggressive, as Pinwheel has relatively low health and can be defeated quickly with a relentless assault.
Pinwheel is also known to be the easiest Dark Souls boss, so you shouldn’t have any trouble if you charge in head first.
Gravelord Nito
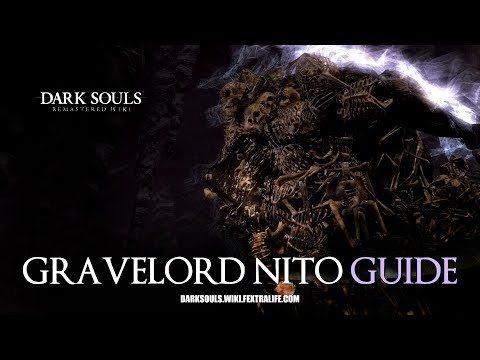
Location: Tomb of the Giants
Loot: Lord Soul, Humanity
How To Beat Gravelord Nito
Gravelord Nito is a powerful and terrifying boss found in the Tomb of the Giants. This skeletal deity can summon minions and unleash devastating AoE attacks.
To defeat Nito, use a divine weapon to dispatch his minions permanently, and stay close to him to avoid his Gravelord Sword Dance attack. Be cautious of his AoE attack and strike when you have the opportunity.
Seath the Scaleless

Location: The Duke’s Archives (1st encounter) and Crystal Cave (2nd encounter)
Loot: Bequeathed Lord Soul Shard, Moonlight Greatsword, Humanity
How To Beat Seath the Scaleless
Seath the Scaleless is an ancient dragon found in The Duke’s Archives and Crystal Cave. This blind and scaleless creature uses powerful crystal magic to attack and defend.
To defeat Seath, destroy the Primordial Crystal in the cave to make him vulnerable, then dodge his crystal attacks and focus on striking his tentacles. Be cautious of his curse-inducing breath.
The Four Kings

Location: New Londo Ruins
Loot: Bequeathed Lord Soul Shard, Humanity
How To Beat The Four Kings
The Four Kings are a quartet of powerful bosses found in the New Londo Ruins. Each king wields a variety of powerful magic and melee attacks.
To defeat them, wear high magic resistance armor and close the distance quickly, as their melee attacks deal less damage at close range. Focus on defeating each king as quickly as possible, as they can respawn if you take too long.
Ceaseless Discharge (Optional)

Location: Demon Ruins
Loot: 20,000 Souls, Gold-Hemmed Black Set
How To Beat Ceaseless Discharge
Ceaseless Discharge is an optional boss found in the Demon Ruins. This massive lava creature can unleash devastating fire attacks.
To defeat it, grab the Gold-Hemmed Black Set to trigger its aggression, then lure it back to the fog gate. When it leaps to attack, strike its arm to make it lose its grip and fall to its demise.
Centipede Demon (Optional)

Location: Demon Ruins
Loot: Orange Charred Ring
How To Beat Centipede Demon
The Centipede Demon is an optional boss found in the Demon Ruins. This monstrous creature can deal massive damage with its long limbs and has a large pool of health.
To defeat the Centipede Demon, fight on solid ground to avoid the lava, and dodge its sweeping attacks. Focus on attacking its limbs and severing its tail, which will drop the Orange Charred Ring. This ring will provide you with lava resistance, making the fight significantly easier.
Firesage Demon (Optional)

Location: Demon Ruins
Loot: Demon’s Catalyst, Humanity
How To Beat Firesage Demon
The Firesage Demon is an optional boss found in the Demon Ruins. This demon resembles the Stray Demon, but its attacks are imbued with fire.
To defeat the Firesage Demon, dodge its powerful fire-infused AoE attacks and position yourself behind it to strike. Be patient and make use of fire-resistant gear to help mitigate damage.
Bed of Chaos

Location: Lost Izalith
Loot: Lord Soul, Humanity
How To Beat Bed of Chaos
The Bed of Chaos is a unique and challenging boss found in Lost Izalith. This chaotic entity is protected by a series of barriers and can create dangerous environmental hazards.
To defeat the Bed of Chaos, destroy the two glowing orbs on either side of the arena, then traverse the treacherous path to the center and destroy the final glowing core. Patience and cautious movement are essential in this battle.
Gwyn, Lord of Cinder

Location: Kiln of the First Flame
Loot: Soul of Gwyn, Lord of Cinder
How To Beat Gwyn, Lord of Cinder
Gwyn, Lord of Cinder, is the final boss in Dark Souls Remastered. This once-great deity wields powerful fire and melee attacks, making him a formidable opponent.
To defeat Gwyn, learn to parry his attacks, which will leave him vulnerable to ripostes. Alternatively, dodge his attacks and strike when there’s an opening. Be cautious of his grab attack, which can deal massive damage.
Dark Souls Prepare to Die Edition – DLC Bosses
Sanctuary Guardian

Location: Sanctuary Garden
Loot: Guardian Soul, Guardian Tail, Humanity
How To Beat Sanctuary Guardian
The Sanctuary Guardian is the first DLC boss found in the Sanctuary Garden. This fierce, chimera-like creature has a variety of lightning and water-based attacks.
To defeat the Sanctuary Guardian, dodge its projectiles and strike when it lands after a charge. Be patient and maintain your distance when necessary to avoid its powerful attacks.
Artorias the Abysswalker

Location: Oolacile Township
Loot: Soul of Artorias
How To Beat Artorias the Abysswalker
Artorias the Abysswalker is a powerful and swift DLC boss found in Oolacile Township. This fallen knight uses a combination of dark magic and acrobatic melee attacks.
To defeat Artorias, learn to dodge his attacks, interrupt his power-up sequence by dealing enough damage, and strike when there’s an opening. Stamina management and timing are crucial in this battle.
Black Dragon Kalameet

Location: Royal Wood
Loot: Calamity Ring, Obsidian Greatsword (if the tail is severed)
How To Beat Black Dragon Kalameet
Black Dragon Kalameet is a fearsome DLC boss found in the Royal Wood. This massive dragon has powerful fire breath and devastating physical attacks.
To defeat Kalameet, dodge its fire attacks and focus on striking its head and legs. Be patient and maintain your distance when necessary. Severing its tail will grant you the Obsidian Greatsword as a bonus.
Manus, Father of the Abyss

Location: Chasm of the Abyss
Loot: Soul of Manus, Humanity
How To Beat Manus, Father of the Abyss
Manus, Father of the Abyss, is the final DLC boss and one of the most challenging encounters in the game. This monstrous creature uses a variety of powerful dark magic and physical attacks.
To defeat Manus, learn to dodge his attacks, use the Silver Pendant to deflect his dark magic, and strike when there’s an opening. Patience, timing, and proper positioning are crucial in this battle. Additionally, summoning the NPC Sif to assist you during the fight can provide some much-needed relief from Manus’s relentless assault.
By carefully following these strategies and preparing yourself for each boss encounter, you will be well-equipped to face and conquer all of the challenges that Dark Souls Remastered has to offer. Don’t forget to learn from your mistakes, adapt your tactics, and most importantly, never give up. Good luck, and may the flames guide thee!